Playbook How to Pass UTM Values from Cookies to Hidden Fields in a Form
In our previous playbook titled How to Capture and Store UTM Parameters using Javascript and Cookies we covered how to implement a javascript tracking code to capture and store UTM parameters in cookies.
In this playbook, we will cover how to pass the values from those cookies into hidden fields in your form submissions.
Quick Overview of the Method
From our previous playbook, we already have UTMs, landing page, and conversion page values stored in separate cookies. In this playbook we will cover the following:
- Adding hidden fields to your forms
- Implementing a javascript snippet to pass the values from the cookies into the hidden fields
- Considerations when using forms from different marketing automation platforms
Step-by-Step Guide to Implementing the Playbook
1. Adding hidden fields to your forms
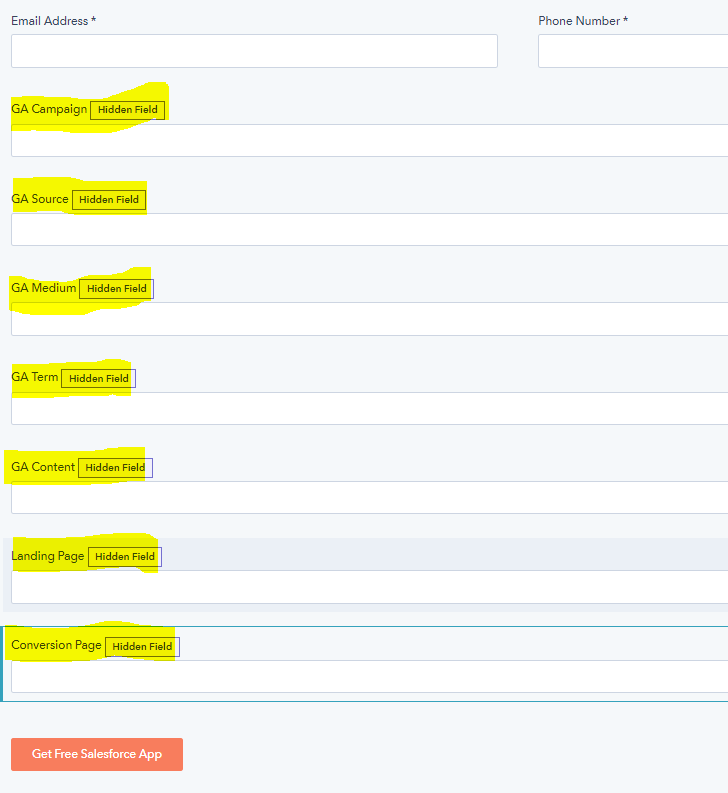
Add the following 7 fields as hidden fields to all your forms:
- UTM Campaign (temp) (utm_campaign_temp)
- UTM Medium (temp) (utm_campaign_temp)
- UTM Source (temp) (utm_campaign_temp)
- UTM Content (temp) (utm_campaign_temp)
- UTM Term (temp) (utm_campaign_temp)
- Landing Page (temp) (utm_campaign_temp)
- Conversion Page (temp) (utm_campaign_temp)
As a best practice, I like to add "(temp)" to the field names as these will later be cleared out after a certain period of time. It also prevents the issue outlined below with HubSpot prefilling the field from the URL parameter.
Additionally, pay close attention to the "name" of the fields as this is important in the next step.
Here is what the fields would look like in HubSpot:
2. Implementing a javascript snippet to pass the values from the cookies into the hidden fields
In this step we are going to implement a javascript snippet using Google Tag Manager to pass the values from the cookies into the hidden fields in the form.
Note that Marketo natively supports getting the values directly from the cookie in their form builder, so this step may not be necessary for Marketo users (see below).
Here are the steps:
1. Get the Javascript Tracking Code
Copy-and-paste the javascript snippet from HERE.
2. Log into Google Tag Manager
While you can copy-and-paste the javascript snippet directly into your website's HTML, the preferred method is to use Google Tag Manager. Most likely you already have Google Tag Manger implemented across your website. If not, we are not going to go into how to implement Google Tag Manager in this article as there are many resources on how to do so already.
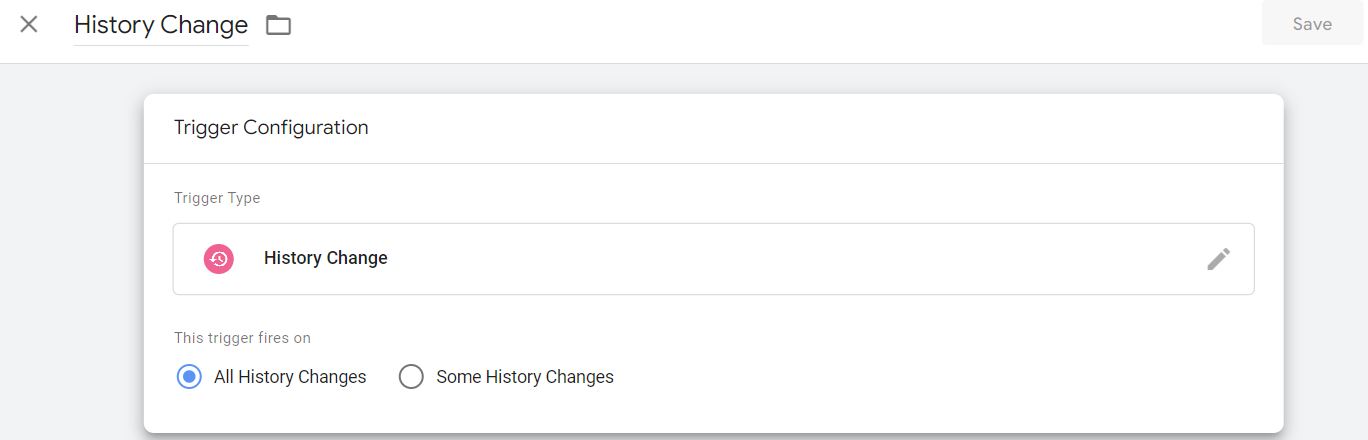
3. Create a "History Change" Trigger in Google Tag Manager
In Google Tag Manager, follow these steps to create a "History Change" Trigger (note you may have already created it in our previous playbook):
- Click on "Triggers" in the left navigation
- Click the "New" button
- Update the name of the trigger to "History Change"
- Click into "Trigger Configuration"
- Select "History Change" as the trigger type
- Confirm that this trigger fires on "All History Changes"
- Click "Save"
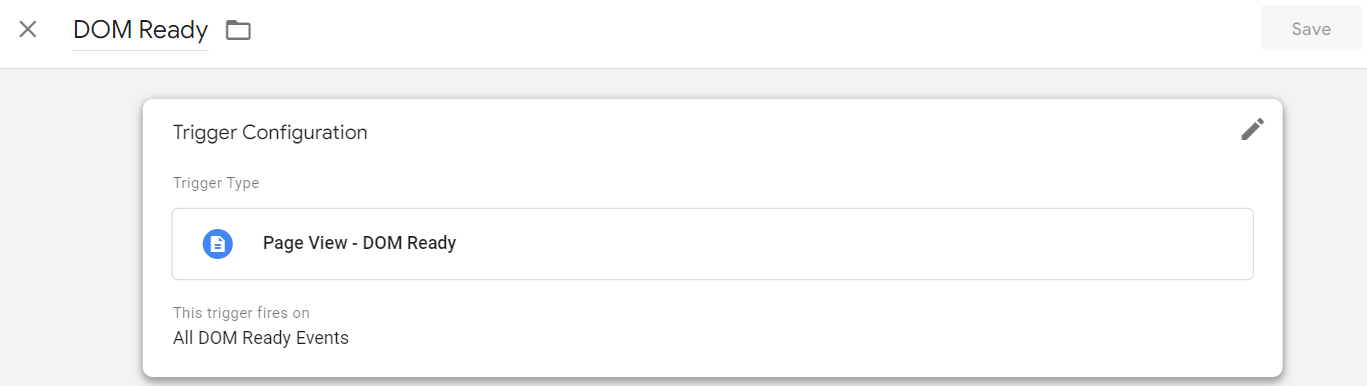
4. Create a "DOM Ready" Trigger in Google Tag Manager
In Google Tag Manager, follow these steps to create a "DOM Ready" trigger:
- Click on "Triggers" in the left navigation
- Click the "New" button
- Update the name of the trigger to "DOM Ready"
- Click into "Trigger Configuration"
- Select "DOM Ready" as the trigger type
- Confirm that this trigger fires on "All DOM Ready Events"
- Click "Save"
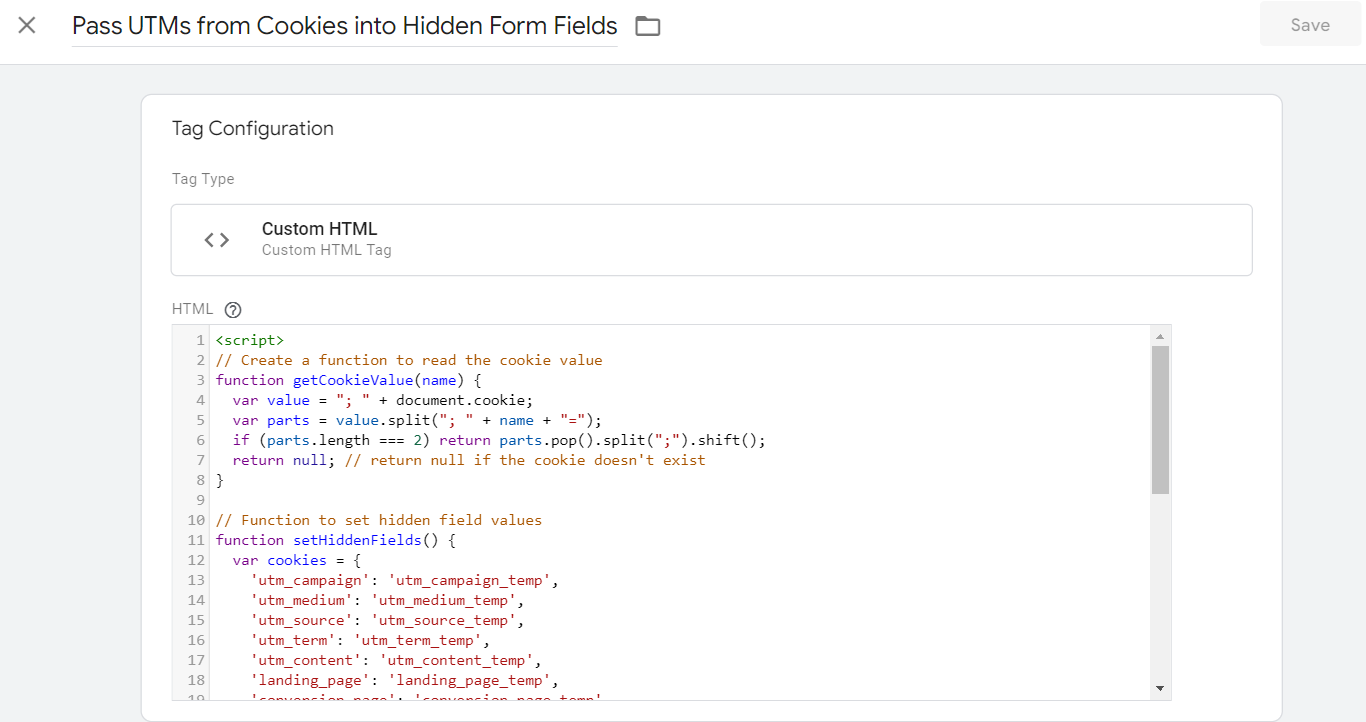
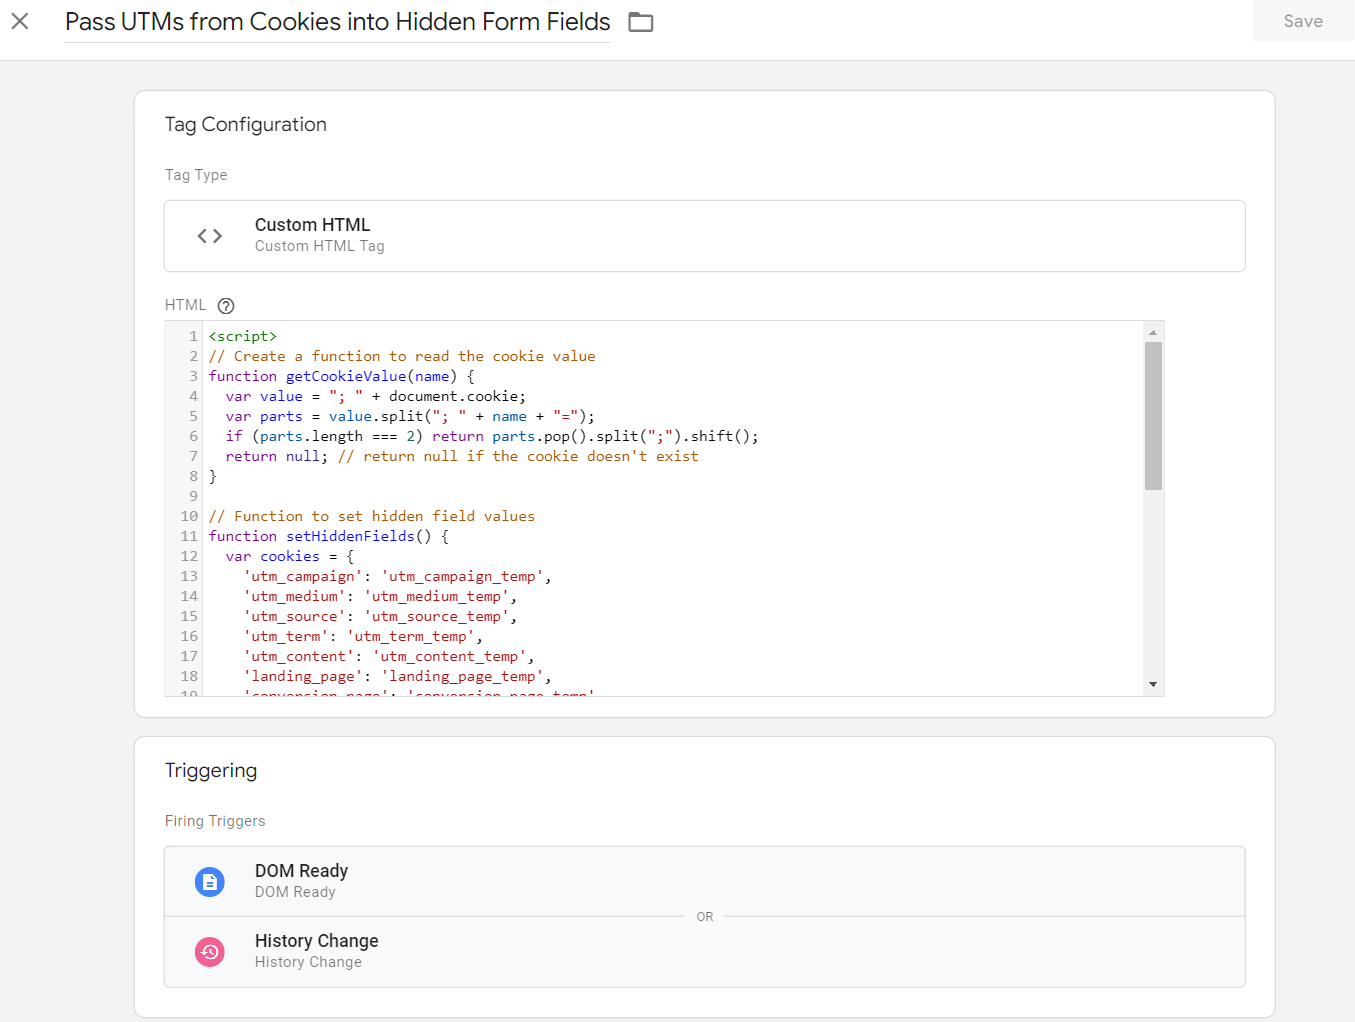
5. Create a Tag in Google Tag Manager
In Google Tag Manager, follow these steps to create a Tag:
- Click on "Tags" in the left navigation
- Click the "New" button
- Update the name of the tag to "Pass UTMs from Cookies into Hidden Form Fields"
- Click into "Tag Configuration"
- Select "Custom HTML" as the tag type
- In the "HTML" section, paste in the javascript snippet from step #1 above
6. Configure the Trigger for your "Pass UTMs from Cookies into Hidden Form Fields" Tag
While still editing the "Pass UTMs from Cookies into Hidden Form Fields" tag, do the following:
- Click into "Triggering"
- Choose the "DOM Ready" trigger
- In the "Triggering" section, click the "+" icon
- Choose the "History Change" trigger
- If you followed the steps properly, it should look like the following:
- Click "Save"
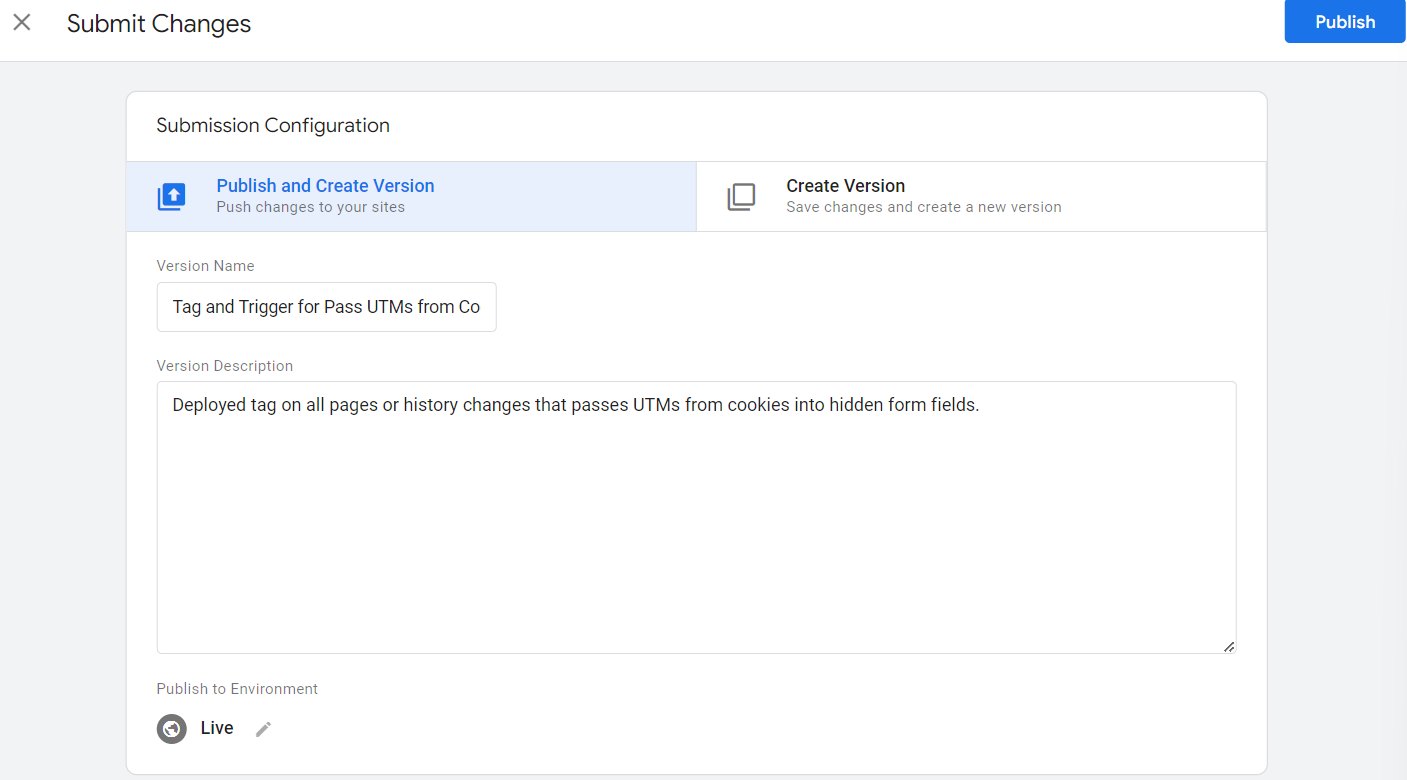
7. Publish your changes
In order to make your new tag, History Change trigger, and DOM Ready trigger live on your website, you need to publish your changes in Google Tag Manager:
- Confirm you are on your "Workspace" tab in Google Tag Manager
- Click the "Submit" button
- Add the following Version Name: Tag and Trigger for Pass UTMs from Cookies into Hidden Form Fields
- Add the following Version Description: Deployed tag on all pages or history changes that passes UTMs from cookies into hidden form fields.
- Click "Publish"
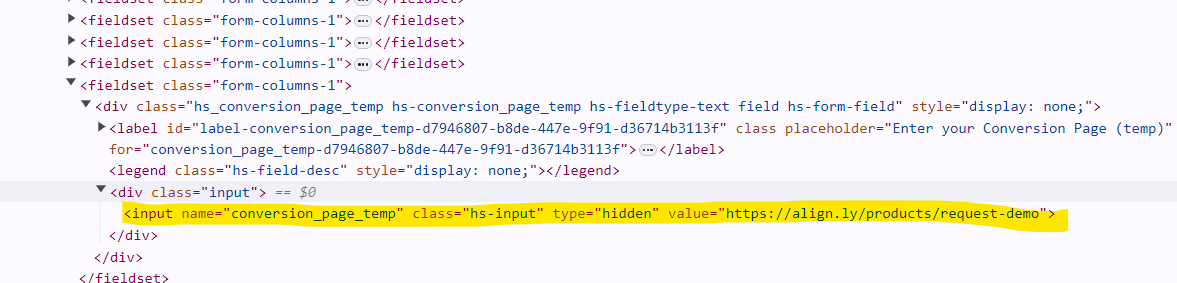
8. Confirm it is working properly
You are now live! Congrats! To confirm it is working properly, you can view the source code of one of your forms and you should see the "value" pre-populated. In Google Chrome, do the following:
- In Google Chrome, click on the 3 dots in the top right and select "New incognito window"
- Go to a page on your website that has a form
- Right click on the form and select "inspect"
- Find the "input" tag for your hidden fields on your form
- If configured properly, you should see values in your hidden fields
3. Considerations when using forms from different marketing automation platforms
- iFrames in HubSpot and Pardot - Pay close attention to how the form is embedded on your website. Many marketing automation platforms by default embed the form using an iframe, which does not work. This is because accessing and manipulating an iframe's content from a different domain is restricted by the Same-Origin Policy, a security feature implemented by browsers to prevent cross-site scripting attacks. In HubSpot, you want to change the toggle on your form so that it is "raw HTML". In Pardot you want to either use a form handler or copy the raw HTML of a form and embed it directly into your website.
- Prefilled fields in HubSpot - HubSpot has default behavior where if the URL parameter name matches the form field name exactly, HubSpot will prefill it with the value from the URL. For example, if you name a field "utm_medium" and the API name of the field in HubSpot is also "utm_medium" then you will see this behavior. Where this causes problems is when your cookies have a stored value and then the URL has newer, different values. The solution here is to avoid naming your properties with the exact same name as the 5 UTM parameters.
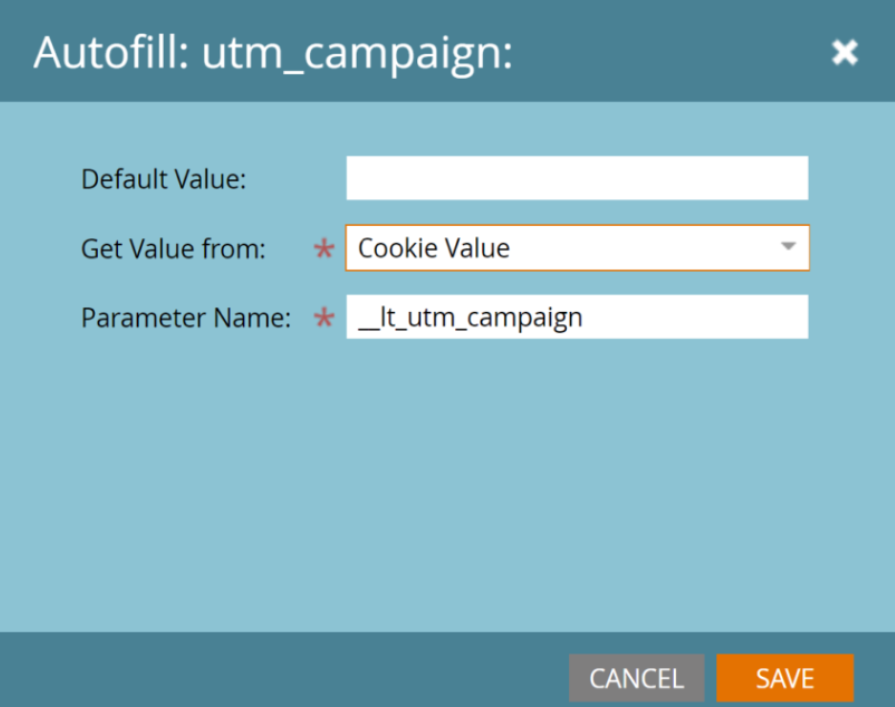
- Native Cookie Support in Marketo - When adding a field to a Marketo form, Marketo gives you the option to autofill the value of the field by using a cookie value. This means that when using Marketo, you can use this method instead of implementing the javascript snippet.
Ready to take the next step? Request a demo today.
We will follow-up with you shortly to schedule a day/time that works for you and your team.
Request a Demo