Playbook How to Capture and Store UTM Parameters using Javascript and Cookies
This playbook is a detailed step-by-step guide on how to properly capture and store UTMs, landing page, and conversion page in cookies so that they can later be passed into hidden fields in your forms so you can get accurate source and medium data on where and how your prospects are visiting your website.
Quick Overview of the Method
Here are the highlights of how this method will work:
- Add the javascript tracking code from this playbook to your website using Google Tag Manager (or directly in your code)
- Load the javascript tracking code on all pages you want to track including subdomains using Google Tag Manager
- When a visitor hits your website, the javascript tracking code will store their UTMs as well as landing page and conversion page in separate cookies in their browser
- If there are no UTMs in the referring URL or the visitor came directly to your website, the script will parse the referring URL and categorize it as organic search, organic social, referring site or direct
- By default, the cookies will store this data for 1 day (24 hours) and then the cookies will expire
- Once your cookies are set, the original values will persist until the cookies expire
- UTM, landing page, and conversion page values from the cookies will be passed into hidden fields in your forms
Frequently Asked Questions about the Method
Why store UTM parameters in a cookie?
There are several reasons why storing the UTM parameters in a cookie is best practice:
- Not all visitors to your website will come via a URL that has UTM parameters, so we need a way to parse the referral URL and store those values for things like organic search, organic social, referring site, and direct.
- As soon as a visitor navigates to another page on your website, the URL parameters are no longer in the URL, so you need a way to store the original values.
- A visitor may come of your website a few different times from different sources over a short period of time. Storing the original values in a cookie and not overwritting them ensures accurate tracking.
- If a visitor leaves your website, closes their browser window, and then returns to your website, your cookie values will have persisted.
What if there are no UTM parameters in the URL?
Not everyone visiting your website will come to your website via a referring URL that has UTM parameters. In fact, for a lot of companies, most of their traffic comes via channels that do not have UTM parameters. These channels are typically organic search, organic social, referring sites, and direct.
Our javascript tracking code is designed to first check if there are UTM parameters in the URL and, if not, it parses the referring URL and updates the UTM parameters accordingly based on if it is organic search, organic social, referring site, or direct.
What if someone leaves my website and then returns?
One of the benefits of storing the values in cookies is that the cookies will persist and be retained even if someone leaves your website, closes their browser, and then returns to your website. The only gap you will have is if the user visits your website on one device (ie laptop) and then returns to your website on another device (ie phone).
How long will the cookie last before expiring?
By default, the cookies will last 1 day (24 hours) and then they will expire. This can easily be updated in the script if you prefer to change that timeframe.
Will the cookies work across subdomains?
Yes, the script is designed to work for the root domain (ie example.com) and across all subdomains (ie sub.example.com), so if you have a paid ad sending traffic to a subdomain and then the user clicks over to your root domain and fills out a form, the UTMs from the paid ad will have persisted and will be passed into the hidden fields in your form.
Can this method also capture the landing page and conversion page?
Yes, the javascript tracking code will also set cookies for the landing page (first page that was visited) and the conversion page (page that the visitor filled out the form on). In addition to the UTM data, these two pieces of information are also extremely valuable when optimizing your go-to-market strategy.
Step-by-Step Guide to Implementing the Javascript Tracking Code
1. Get the Javascript Tracking Code
Copy-and-paste the javascript tracking code from HERE.
2. Log into Google Tag Manager
While you can copy-and-paste the javascript tracking code directly into your website's HTML, the preferred method is to use Google Tag Manager. Most likely you already have Google Tag Manger implemented across your website. If not, we are not going to go into how to implement Google Tag Manager in this article as there are many resources on how to do so already.
3. Create a "History Change" Trigger in Google Tag Manager
In Google Tag Manager, follow these steps to create a "History Change" trigger:
- Click on "Triggers" in the left navigation
- Click the "New" button
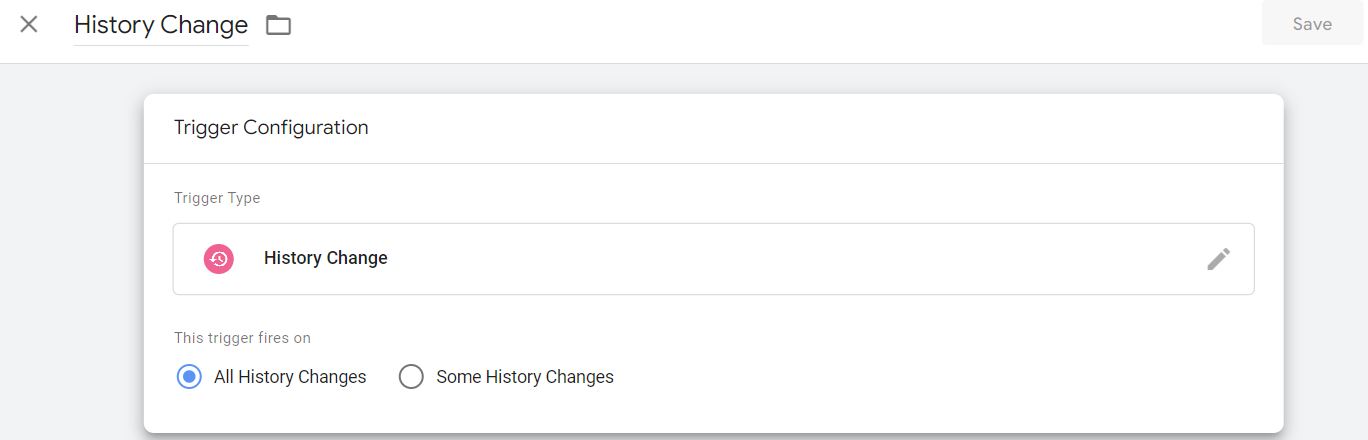
- Update the name of the trigger to "History Change"
- Click into "Trigger Configuration"
- Select "History Change" as the trigger type
- Confirm that this trigger fires on "All History Changes"
- Click "Save"
4. Create a Tag in Google Tag Manager
In Google Tag Manager, follow these steps to create a Tag:
- Click on "Tags" in the left navigation
- Click the "New" button
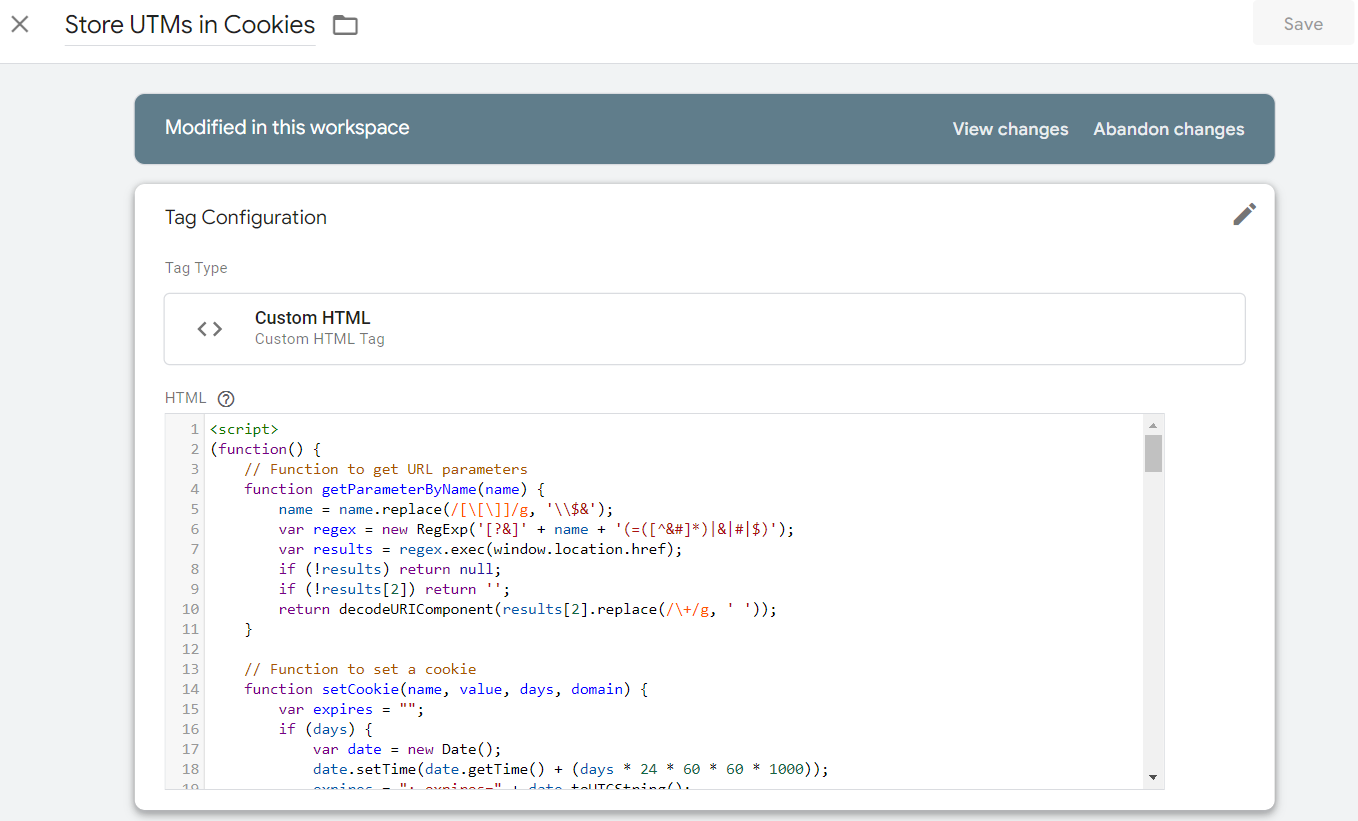
- Update the name of the tag to "Store UTMs in Cookies"
- Click into "Tag Configuration"
- Select "Custom HTML" as the tag type
- In the "HTML" section, paste in the javascript tracking code from step #1 above
5. Configure the Trigger for your "Store UTMs in Cookies" Tag
While still editing the "Store UTMs in Cookies" tag, do the following:
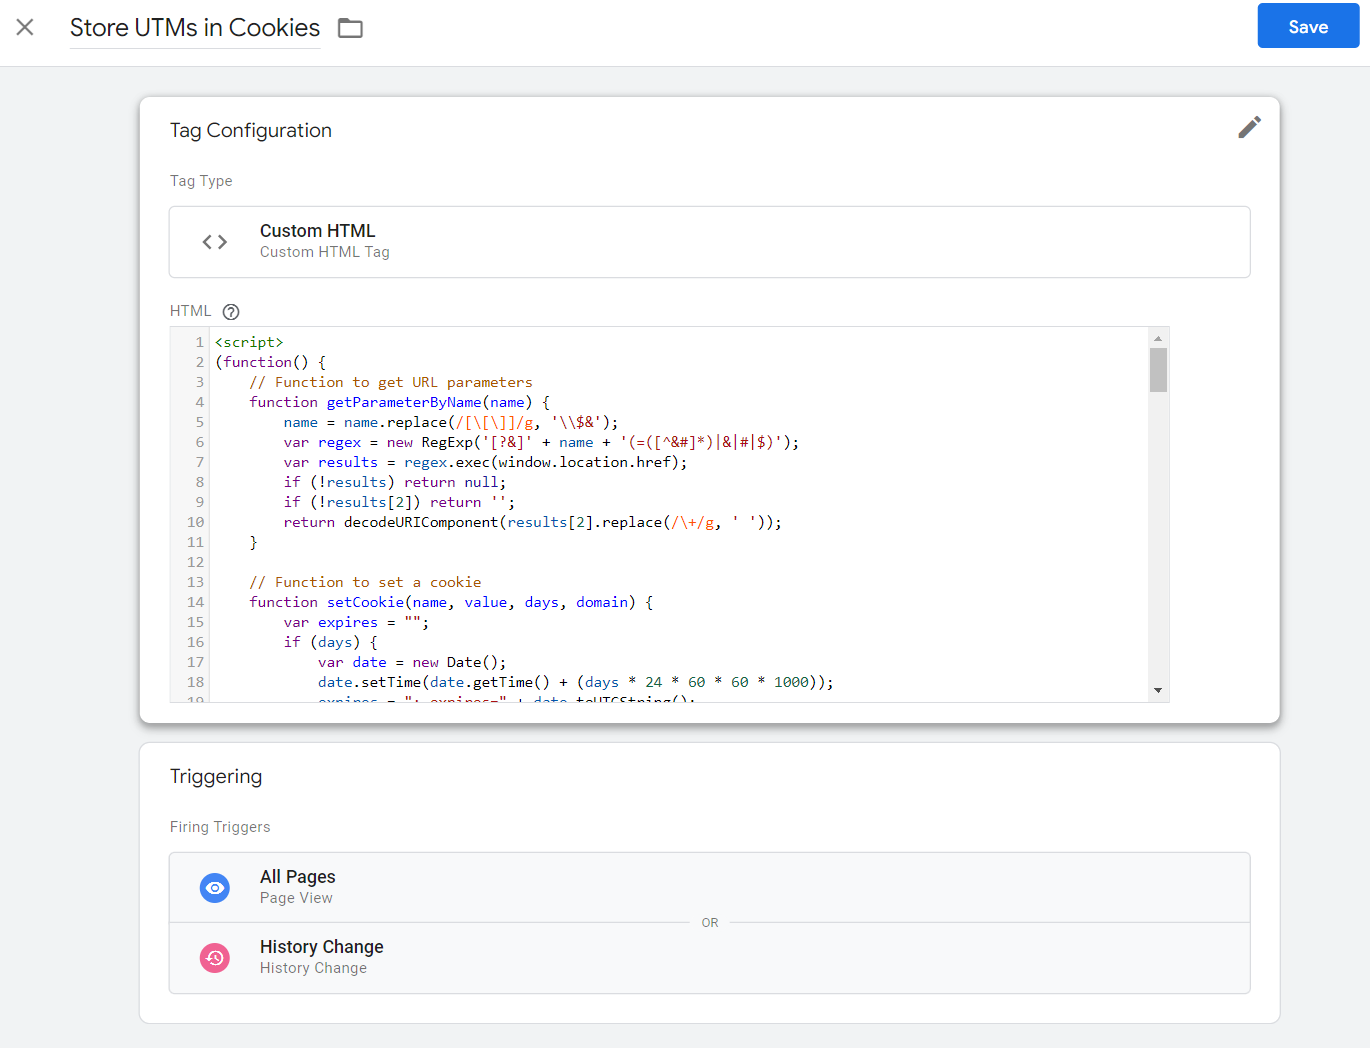
- Click into "Triggering"
- Choose the "All Pages" trigger
- In the "Triggering" section, click the "+" icon
- Choose the "History Change" trigger
- If you followed the steps properly, it should look like the following:
- Click "Save"
6. Publish your changes
In order to make your new tag and History Change trigger live on your website, you need to publish your changes in Google Tag Manager:
- Confirm you are on your "Workspace" tab in Google Tag Manager
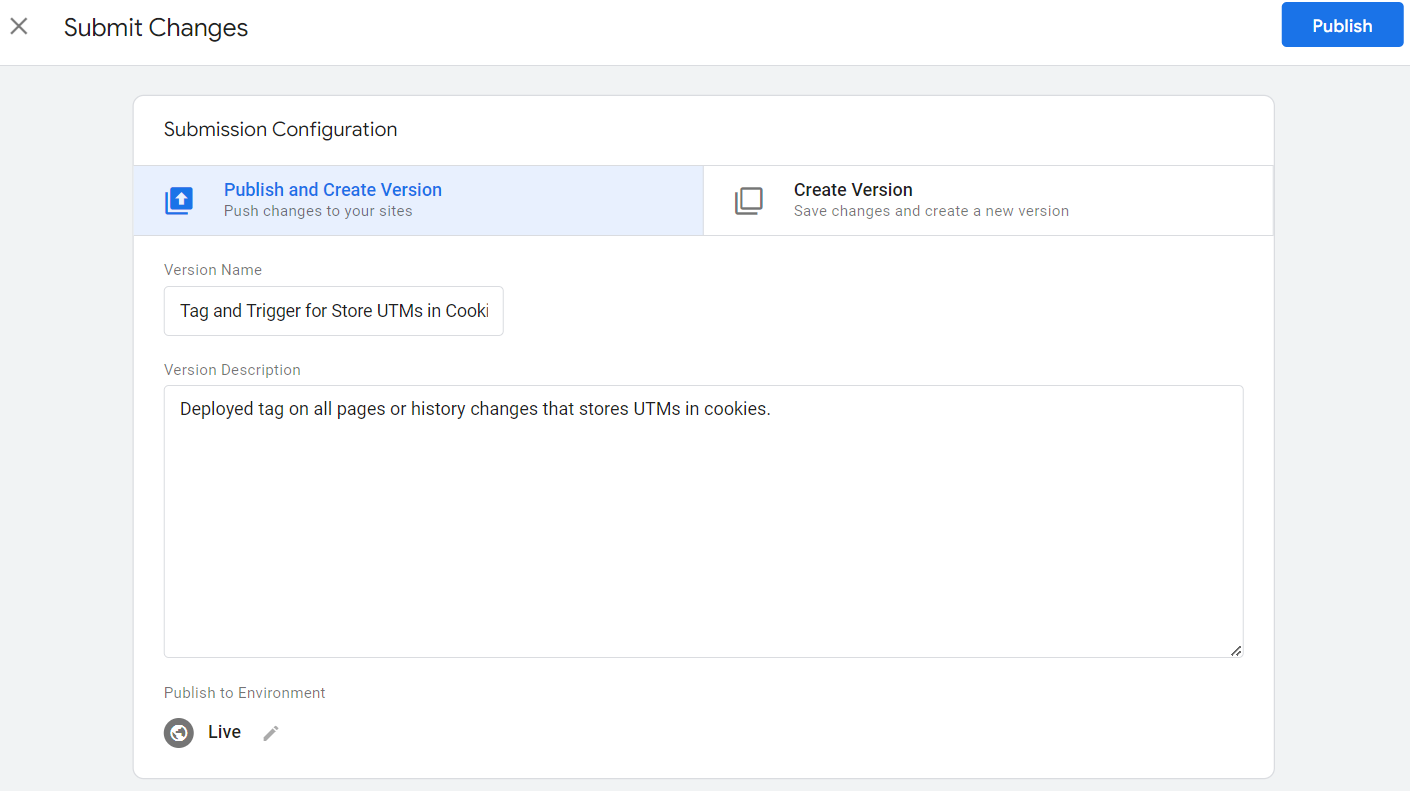
- Click the "Submit" button
- Add the following Version Name: Tag and Trigger for Store UTMs in Cookies
- Add the following Version Description: Deployed tag on all pages or history changes that stores UTMs in cookies.
- Click "Publish"
7. Confirm it is working properly
You are now live! Congrats! To confirm it is working properly, you can view your cookies. In Google Chrome, do the following:
- In Google Chrome, click on the 3 dots in the top right and select "New incognito window"
- Go to your website that you just installed the javascript tracking script on
- Right click on the screen and select "inspect"
- Click on the "Application" tab
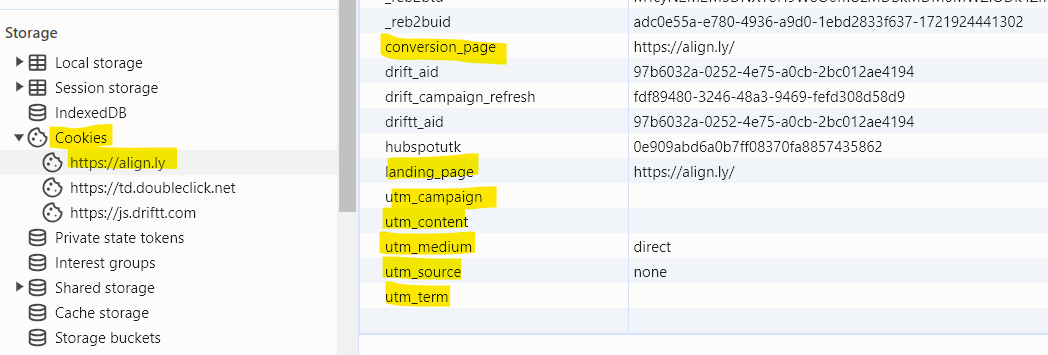
- In the left navigation, find "Cookies" and then select your website
- If configured properly, you should see your UTM, landing page, and conversion page cookies and their values
Next Step: Passing Values from your Cookies into Hidden Fields in your Forms
Now that you have all your UTMs, landing page, and conversion page properly being captured and stored in cookies, it is time to take the next step and follow our playbook on How to Pass UTM Value from Cookies to Hidden Fields in a Form.
Ready to take the next step? Request a demo today.
We will follow-up with you shortly to schedule a day/time that works for you and your team.
Request a Demo